Monday, December 20, 2010

Christmas Cards

I ordered our Christmas cards from Shutterfly this year..... and it made me want to go back and look at our cards from years past.  So, here they are...

Our first Christmas card together was in 2006, the year we were married.  So, we used a photo from the wedding and created a photo card using Snapfish.  FYI... Charlie Pappas was our fabulous wedding photographer!

Christmas 2007... a new member joined our family.  Our beloved yellow lab, Butters, who is truly our first child.  I designed these myself, printed them on photo paper and then affixed them to brown cardstock.

Christmas 2008... our family had grown yet again!  Ringo joined our family in February of that year.  I also designed these myself (apparently I was into polka dots for a while!) and printed them using Vistaprint.  They were folded cards and here is the front:
This is the inside of our cards that year.  We announced to our extended family and friends that we were having a baby!

And in 2009 our baby boy joined the family!  These photos were taken by Jody Lynn Photography and we used one of the card designs she had to choose from, with some modifications.  This is the front:
And this is the inside (photo on the left, text and photos on the right):


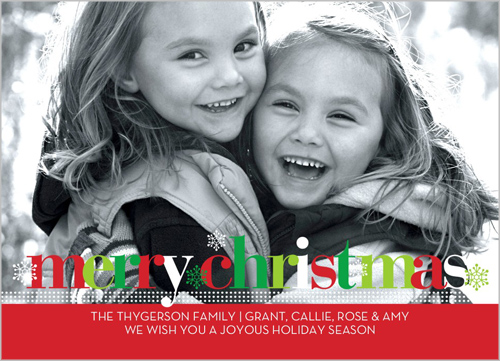
Which brings us to 2010!  Our little man is growing up!  These photos were taken by Danielle Bryson Photography and I LOVE how they turned out!  I used Shutterfly to make the cards, and got 50 free thanks to my earlier blog post!  Here is the front of the card:
And this is the inside of the card:


So, there you go - 5 years of Christmas cards and many more to come!

Saturday, December 18, 2010

Our Holiday Photos... an adventure, but totally worth it!

We had some photos taken in November because it had been several months since we had any taken and we hoped we would get one (or more) to use for our Christmas cards.  We signed up for a mini session with the amazing Danielle Bryson of Danielle Bryson Photography, I picked out the outfits way ahead of time, and thought we were all set.

Well, on the day of the shoot we were late leaving the house, had trouble finding the park where we were supposed to meet her, and it started sprinkling on our way there.  I was stressed, to say the least.  Oh, and did I mention our dogs were with us because we were determined to get a photo with them for the Christmas cards??  Um, yeah.  We arrived and Danielle was great and didn't chastise us for being late but Brady was not very cooperative (he was distracted by the other dogs in the park) and then because it was so cloudy we lost our light and basically it got dark about 20 minutes sooner than we expected.  Danielle did manage to get a few good shots of us before it got dark but she wasn't 100% satisfied so she contacted me and offered to do another shoot for free and give us those pictures in addition to any good ones she got from the first shoot.  She is amazing!

So, we planned to meet up again about a week after Thanksgiving.  It was cold that day, but not painfully so - until we got to the park!  The wind was blowing so hard that we basically couldn't stand to be outside without our coats on and poor Brady was just freezing!  So, she worked quickly to get a few shots of Brady in his outfit he wore to see Santa (we saw Santa that morning), then we threw on his sweater, coat, and hat and grabbed our coats and huddled for warmth!  It was sooo cold!  It felt like we were only out there for about 5 minutes and we were all back in the warmth of our cars.

Danielle sent me the picture the next day (I told you she is awesome) and she got some fantastic shots!  I am really so happy with how the pictures turned out and we got more than enough good ones for our holiday cards and I have ordered prints for our parents as gifts.

So, without further ado, here are some of my favorites:

From the first shoot:

Family shot with our puppies!


You can see how dark it actually got outside!  I still think this one is cute, though:

From our second shoot... Brady in his cute vest and tie after visiting Santa:

One of my favorite pictures of Brady - ever:

I think you can FEEL how cold it was by looking at this photo:

After we grabbed coats, hats, scarves and huddled for warmth!


I love these guys and I love this photo!

Thanks again to Danielle for being so awesome!

Friday, December 17, 2010

Brady visits Santa

A couple of weeks ago we took Brady to visit Santa at Phipps Plaza.  I was worried that he was going to cry because I hear of so many other babies and toddlers that want nothing to do with sitting in the big man's lap.  Showing once again that he has his Daddy's temperament, though, he did absolutely amazing and just sat there, chilling, while we took pictures.  It was really adorable!

Here are a few photos from that day:


Merry Christmas!

Wednesday, December 8, 2010

Photo books... and I love a good deal!

I love photos!  I think I've said that before.  I love that I can share digital photos with family and friends through Facebook and through this blog and Brady's blog.  I also like printing out photos, though, and holding them in my hand.  For that reason I have been making photo books (using Shurtterfly) to give to Brady's grandparents for the past year and a half.  I made them last Christmas and then again on Mother's Day and now I've made more for this Christmas.  I have been very pleased with how the past ones have turned out and just placed my order for the new ones yesterday.  So, I thought I'd share what I made.

This is the photo book I made for MrKLB's parents last Christmas:
and the one I made for Mother's Day:

and this is the on for my mother last Christmas:
and the one for my mother on Mother's Day:

and this is the one for this Christmas (used the same photo for both this year):


Here are a couple of examples of the pages inside:
I order the 5x7 soft cover photo book for all of them.  Shutterfly has 2 ways that you can create your book: you can do the Custom Path or Simple Path.  I didn't realize it, but the past 4 that I've made I used Custom Path, where you add the photos to the page and select the layouts, etc., and this time I used the Simple Path where they automatically add all of the photos and you go back in and edit.  I like both ways but the main thing I didn't like about Simple Path is that you can't put a photo on the back of the book and you can't change the font or sizes.  There are clearly more options with Custom Path and I wish it would have allowed me to change from Simple to Custom along the way so that I could have made those changes.  One new thing I do like, though, is that Shutterfly will now let you pull photos from Picasa web albums so you don't have to upload them or have them already on Shutterfly.  That was convenient since all of the photos on Brady's blog were in Picasa and I could just select which ones to use.

I placed my order yesterday and was able to take advantage of 30% off photo books + $10 off + free shipping (on orders over $50) and saved a ton!  I put way to many pages in each book (like 65) so each one ended up costing about $30 (after 30% off) but then I got the extra $10 off and free shipping and ended up paying on about $50!  Not too bad!  (Of course, if you are better at selecting which photos to use and do a smaller book you can get them starting at around $12.)

I also just ordered my Christmas cards through Shutterfly and will do another post on that soon.

Monday, November 8, 2010

It's the Holiday Season!

Okay, so now that Halloween is over and November is here, we've officially entered the holiday season!  I love this time of year and I love it even more now that I have a little one to share it with!  We're having some family photos taken this weekend that we will be using for our holiday cards and I can't wait!

Speaking of holiday cards, have you heard about Shutterfly's promotion this year?  Bloggers can get 50 free holiday cards from Shutterfly if they blog about the holiday card collection!  (If you're interested, fill out the form here).  I have used Shutterfly in the past to create photo books (and probably will be doing so again this year!) but I haven't ordered any cards from them.  When I heard about the promotion, though, I went to check out their selection and was very impressed with a lot of the new designs.  So, I thought I'd blog about it here and maybe even end up using them for our cards this year!

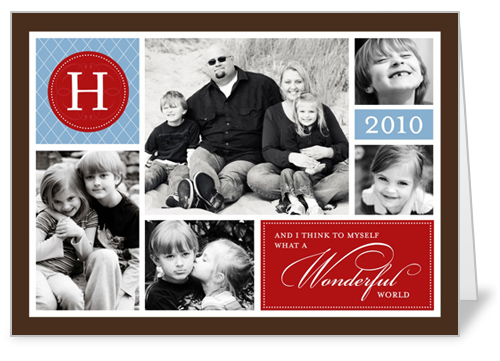
Of course my favorites are the photo cards.  You can do one photo:

Or if you love photos as much as I do you can include lots of them:
You can see all of the photo cards and stationery here:  http://www.shutterfly.com/cards-stationery

And check out this link specifically for the holiday cards:  http://www.shutterfly.com/cards-stationery/holiday-cards

They have a nice selection of traditional and modern styles and you can choose flat or folded options.  I think the prices are pretty reasonable, too... of course that depends on how many cards you send out.  If you're like me, you send more and more each year and it starts to add up!  Getting 50 free cards really helps out with that, though!

I usually wait to see our photos and pick out my favorites and they try to pick a style of card that I like based on those photos.  So, it will be another couple of weeks before I decide which cards we'll be using this year, but until then I'll be looking around and picking out my favorites!

Monday, November 1, 2010

The making of Superman...


I've always loved Halloween.  Growing up my brother and I would always get dressed up and usually go over to our cousins' neighborhood to trick-or-treat because we didn't actually live in a "neighborhood" so there were no houses to hit up for candy.  I remember many of my costumes and almost all of them were made by my mother.  Princess, ladybug, mummy, witch... hmm, I guess I need to go ask her to dig up some old pictures because now I'm drawing a blank on the other costumes.  Maybe I'll find them and add them to this blog at some point.

Anyway, for Halloween this year I also wanted to make a costume for my son.  He was going to be Superman, and instead of buying the cheap, uncomfortable costumes I had seen in the store, I got an idea from my best friend to make the cape for him.  I bought some Superman pajamas that I found online (bonus: he can sleep in them this winter!) and used the following website as a guide for how to make the cape:

http://pukingpastilles.com/?p=57

On one side would be Superman and on the other would be a personalized logo for "Bradyman", as we call him.  The idea is that he can use it for the next few years to play "dress-up", so hopefully he will enjoy it on more than just one day!

I was going to use a cotton fabric like in the blog instructions, but MrKLB really wanted the cape to be shiny, so I decided to take on the somewhat more difficult task of working with satin.  My mother went shopping with me and we got all of the supplies that we needed: red and blue satin; yellow, red and white felt; red, blue, yellow, white thread; pins; Heat N Bond material.


I didn't have a pattern, so MrKLB and I just measured how long we thought it should be on Brady and guessed at the width.  I used some old fabric (actually an old sheet) to trace and cut out the size/shape we wanted it to be and then we held it up to Brady, made some adjustments, and used that as the pattern.  I pinned my "pattern" to the red satin and cut it out. leaving about a quarter inch for seams.  Then I used the red fabric as the pattern for the blue fabric.  This is right before I cut the blue satin.  I folded the red in half and placed it on the fold of the blue.  I had pinned the red to the blue, but the pins aren't showing up well in the photo:


And the blue fabric after I've cut it:

Next were the logos.  We needed to trace the logos onto the Heat N Bond material, cut around them, and iron them onto the felt.  Here I've done the Superman logo:

I asked MrKLB to design the Bradyman logo, and here it is.  The B's would be white and the rest would be yellow.

I am not an expert with a sewing machine, and it was a little hard working with two pieces of thick felt, so for both of the logos I actually cut out the top part (the red for Superman and the white B's for Bradyman) and sewed them onto a full piece of felt before cutting that part out.  That allowed me more fabric to hold onto when feeding it through the sewing machine rather than having just a tiny edge.  (Hopefully that makes sense?  I should have taken more photos!)

Anyway, here is the Bradyman logo after I sewed the B's on and then cut out the yellow fabric.  (Oh, and I should add... MrKLB is actually the one who did ALL of the cutting of the felt.  He is much more precise and better at it than I am.  Thank you!):

Okay, so with two logos I then sewed the Superman logo onto the red satin and the Bradyman logo onto the blue.  I used the same color thread as the satin.


Oh, and I used a zig-zag stitch for all of the logo work.  You can kinda see it in this picture, although the bottom is blurry:

After this I attached a piece of velcro to where the cape would fasten around the neck.  I decided to do that before I sewed the two sides together so that the stitching wouldn't show through.

Alright, so then I placed the red and blue satin face to face and sewed about a 1/4 inch seam all the way around, leaving about 6 inches so that I could turn it right side out.  After I turned it right side out, I did a topstitch all the way around.  I was doing really well until this point... my seam was not even at all!  I think I was just ready to be finished and wasn't using as many pins as I had before and the satin fabric started to move some while I was doing the seam.  The perfectionist in me wanted to rip out the entire seam and start over... the Mommy in me knew that I just needed to finish and call it a day.  :)

So, here is the Superman side after I finished the seams:

And here is the Bradyman side:

Anyway, nobody (including Brady!) noticed or cared that the seams weren't even, and I think it turned out great!  And here is Brady modeling it for me:


And here he is about to go trick-or-treating on Halloween night:

Monday, October 11, 2010

Craft time!

I haven't really taken on any new craft projects since Brady's birthday party, but it's getting close to Halloween so I'm embarking on a new project!  I'm making Brady's costume this year - well, part of it, at least - and I'm excited about it!  My mother visited me a few weeks ago and we went shopping for all of the supplies that I needed.  I've been borrowing her sewing machine ever since we made the curtains and crib skirt for the nursery (um, yeah, so I've been borrowing her sewing machine for a year and a half!) and she gave me a few pointers on how to do what I want to do.

My mother's sewing machine is older than I am - literally, the date is on it and it predates me! - but it turns out that is a good thing because it only has a few functions so I don't have too many things to learn.  My mother is an excellent seamstress and she made all of my Halloween costumes when I was growing up.  She also made several of the dresses that I wore to school dances and many other things along the way.  I used to "help" her sew, so I do know the basics but I need practice and still have a lot to learn.

And that brings us to Brady's Halloween costume.  I was inspired by my friend Alison to make this for Brady and it is something he'll be able to use to play dress-up over the next few years.  I like that he will get more wear out of it than just Halloween night - assuming I make it well enough that it doesn't fall apart!

Anyway, here's a sneak peek at what I'm making...

More pictures to come!

Friday, October 8, 2010

The tortoise and the hare

MrKLB and I ran in a half marathon last weekend!  It's the second one we've done together, but it's been about 6 years since we ran the first one together.  MrKLB likes to run 3-4 miles regularly and he enjoys running the Peachtree Road Race, which is a 10k, but beyond that he prefers to ride his bike beside me and cheer me on.  Anyway, I decided I wanted to train for another race and asked him if he wanted to do it.  To my surprise, this time he said yes!  So, for the past couple of months we've tried (tried, being the operative word) to run regularly and build up some mileage so that we would be prepared for the race.  It was a very hot end to the summer here in Atlanta, though, so it was often hard to find the time to get in a run when it wasn't 95 degrees outside.  Add that to the fact that we have a 15 month old son, 2 dogs, and 2 full-time jobs and it was quite a production to get out and run.  Anyway, long story short, we didn't train as much as we should have and almost backed out of the race at least 2 or 3 times in the weeks leading up to the race.  We decided to do it anyway, though, and vowed that even if we had to walk the whole way we were going to finish and we were going to get our medals!  We ended up doing way better than that and had a fantastic time doing it!

I've had several people tell me that they have been inspired to train for and finish a half marathon, so I thought I'd share some of my thoughts on how to accomplish this.

1. Find a training plan online and try (try, once again, being the operative word here) to follow it.  Most plans will tell you to run/walk 2-3 times during the week and then do a longer run on the weekend to build up mileage.  You can start small at 2 miles on the first weekend and then gradually build up to close to 13 miles.  You do NOT (in my opinion) have to run the full 13 miles before the race.  Getting up to 10 or 11 miles is a good idea, though, if you can.  I've used Jeff Galloway's training plans for the full and half marathons before and find them to be good.  He is a big fan of the run/walk program.  There is no shame in walking during the race.  See my story later about the tortoise and the hair!

2. Set a realistic goal for yourself.  Make finishing the race injury free your primary goal.  This is the "I'll be happy" goal.  Then, if you want to do more than just finish, pick a pace you think you can achieve, add about 1 minute per mile to it, and make that your "I'll be really happy" goal!

The cut-off time for the race this weekend was 3.5 hours - which averages to about a 16 minute mile.  SURELY we can do that, we told ourselves, and that was our goal.  We decided to start out at the pace we had trained at, though, walk for 1 minute every mile or two miles, and see how far we could go before we had to walk completely.  It was an absolutely beautiful morning and we followed our plan and - to our surprise - were still running as we hit miles 9, 10, 11...  We ended up sticking to our pace for the entire race and finished with an admirable - and WAY better than our goal of 16 minute miles - pace of 12 minutes per mile!  Now that's the way to feel good about a race!

3. Break the race up into 3 parts.  I am not a fast runner (see my 12 minute mile pace above).  I don't really try to be because training for and finishing the race are the most important to me.  I don't want to push myself so hard that I am injured and I don't really care what people think about my time, so I just run.  At my own pace.  That being said, I think this rule applies even to those who want to run faster than I do.

Part 1: The first 4 miles you will have adrenaline that will kick in.  You'll be excited to finally be at race day and enjoy being around all of the other runners who are out there to accomplish a goal.  The key to Part 1 of the race is to stick to your pace and not push yourself beyond what you've trained for.  You will be tempted to run faster or not stop for your walk break, but if that's the way you've trained then you need to stick to it.  Otherwise, the next 2/3 of the race will be painful!  (I made this mistake in my first marathon by running faster for the first 13 miles than I had the entire time I had trained... believe me when I say that caught up with me around mile 20!)

Part 2: The second 4 miles you shouldn't think about how far you have left to go.  So, you're 4 miles into the race and feeling pretty good.  But, you think to yourself "Wait... I have to do that again... twice??"  That's not going to help so the best thing to do is concentrate on getting through the next 4 miles.  You are on your way to 8 miles.  That's it.  Stick to your pace.  Drink water at the water stations.  Just keep going.

Part 3: Miles 9-12 are going to be hard - mentally.  You've already run 8 miles and still have 4 to go (yes, I know I have been ignoring that 13th mile so far).  This part of the race is all mental.  Don't think about how far you have run so far... think about the miles that remain and pretend you are just starting out.  4 miles... that's not so far.  You can do that!  You've been doing that since a few weeks into your training program.  That's not too bad.  You can do this!  That is what you have to keep telling yourself.  You will do this!

And then, the part I have been ignoring is that last 1.1 miles.  The reason I left that off is that you don't need much of a strategy here.  You are soooo close to being finished!  There's no way you'll give up now.  You don't run 12 miles and then quit with 1.1 to go.  Keep up your pace.  Even if you can't keep up the pace, though, know that you could crawl your way to the finish line and still make it!  When you see that finish line use the adrenaline that kicks in and the cheering fans and push yourself across that line!  Get your medal.  Cool down.  Stretch.  Then go eat whatever you want because you've earned it!
The title of this post is in reference to a comment MrKLB made around mile 9 of the race this weekend.  We were running along and he said "Hey, we've found the hare to our tortoise!"  He said "that girl in front of us in the black tank top - she ran past us towards the beginning of the race and left us behind.  And here we are catching up to her!"  This will happen a lot during the race - especially if you take walk breaks but keep up a steady pace.  You'll catch up to many people that blew past you at the beginning.  Of course, others will blow past you and you'll never see them again!  It doesn't matter though - you're not racing against them... you're racing against yourself.  It just goes to show you that you have to run your race and be proud of what you have accomplished no matter what anyone else is doing.